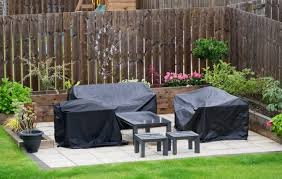


Having a lush, green lawn year-round is every homeowner’s dream—but maintaining natural grass can be time-consuming, costly, and labor-intensive. That’s where artificial grass installation comes in. Whether you’re upgrading your backyard, creating a pet-friendly play area, or adding greenery to a commercial space, synthetic turf offers a durable, eco-friendly, and low-maintenance solution.
In this comprehensive guide, we’ll walk you through everything you need to know about installing artificial grass—from preparation to finishing touches.
1. Benefits of Artificial Grass
Before jumping into the installation process, let’s understand why artificial turf has become so popular.
a. Low Maintenance
Say goodbye to mowing, watering, fertilizing, and weeding. Artificial grass requires minimal upkeep—just occasional brushing and rinsing.
b. Year-Round Greenery
No matter the weather, your lawn stays vibrant and green throughout all seasons.
c. Water Conservation
With synthetic turf, you can reduce water usage by up to 70%, making it an eco-friendly choice—especially in drought-prone areas.
d. Pet & Child Friendly
Artificial grass is durable, soft, and safe for kids and pets. It also drains quickly and resists odors.
e. Long-Lasting Investment
A properly installed artificial lawn can last 10–20 years with minimal maintenance, making it a cost-effective solution in the long run.
2. Tools and Materials Needed
Before starting the installation, gather the following tools and materials:
- Artificial grass rolls
- Shovel and rake
- Turf cutter or utility knife
- Wheelbarrow
- Weed barrier fabric
- Crushed rock or decomposed granite (base layer)
- Sand (optional top layer)
- Turf adhesive or joining tape
- Turf nails or landscape staples
- Broom or power brush
- Infill material (silica sand or rubber granules)
3. Step-by-Step Artificial Grass Installation Process
Step 1: Planning and Measuring
Measure your area carefully to determine how much artificial grass and materials you’ll need. Plan for proper drainage and ensure that water won’t pool on the surface.
Step 2: Removing Existing Grass
Use a turf cutter or shovel to remove the existing lawn, roots, and topsoil—about 3 to 4 inches deep. This ensures a smooth surface for your new installation.
Step 3: Installing the Base Layer
Lay a sub-base of crushed rock, gravel, or decomposed granite. Compact the material using a plate compactor until it’s firm and level. This base ensures stability and drainage.
Step 4: Adding a Weed Barrier
Lay a weed membrane over the base layer to prevent unwanted plant growth through the artificial turf.
Step 5: Laying the Artificial Grass
Unroll your artificial turf and allow it to rest for a few hours so it can flatten out. Make sure the grass fibers all face the same direction for a uniform look.
Step 6: Cutting and Fitting
Cut the turf carefully to fit around edges, curves, and borders. Use a sharp utility knife and make small adjustments as needed.
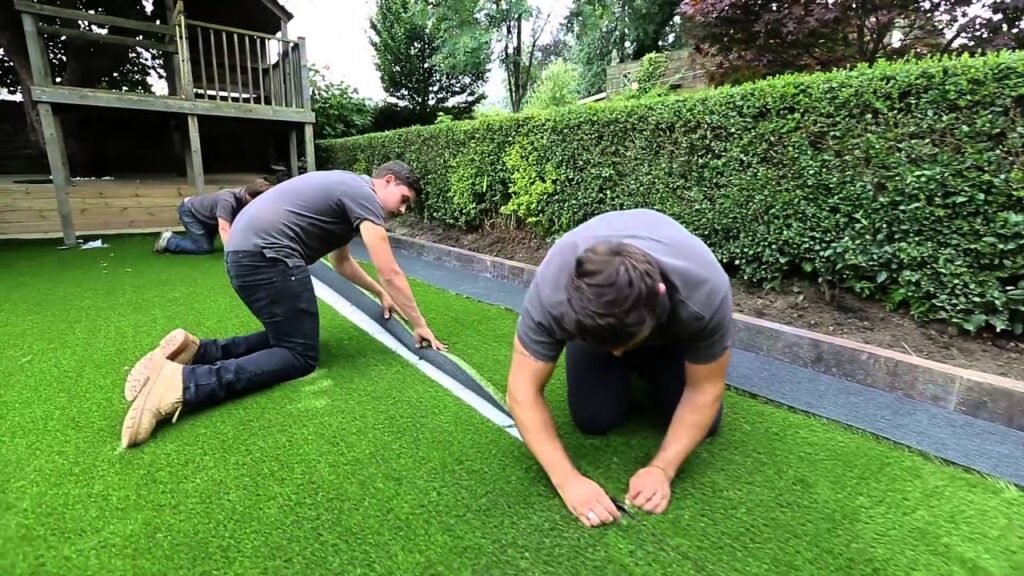
Step 7: Joining the Seams
When connecting multiple rolls, align the grass fibers and use joining tape and adhesive or turf seaming glue to secure the seams. Press down firmly for a seamless finish.
Step 8: Securing the Turf
Use landscape staples or turf nails every 6–8 inches along the perimeter to secure the grass. Be careful not to drive nails through the turf fibers.
Step 9: Adding Infill
Spread infill material (like silica sand) evenly across the grass using a drop spreader or broom. This helps the blades stand upright, provides cushioning, and enhances drainage.
Step 10: Brushing and Finishing
Use a stiff broom or power brush to lift the grass fibers and distribute the infill evenly. Inspect the area for loose edges or uneven spots and make adjustments as needed.
4. Maintenance Tips for Artificial Grass
While artificial grass is low-maintenance, a little care will keep it looking perfect:
- Brush regularly to keep blades upright and debris-free.
- Rinse with water occasionally to remove dust and dirt.
- Clean pet waste promptly using mild detergent and water.
- Avoid sharp objects or open flames near the turf.
- Check seams and edges periodically for any movement or lifting.
5. Cost of Artificial Grass Installation
The cost of artificial grass installation varies depending on size, material quality, and labor. On average:
- DIY installation: $5–$10 per square foot
- Professional installation: $10–$20 per square foot
Although the upfront cost can be higher than natural grass, the long-term savings in water, maintenance, and lawn care make it worthwhile.
6. Choosing the Right Artificial Grass
When selecting synthetic turf, consider:
- Pile height: Shorter blades for sports areas; longer for soft landscaping.
- Density: Higher density means more durability and realism.
- Color tones: Blended greens with brown thatch layers look more natural.
- UV resistance: Prevents fading in sunny climates.
- Drainage system: Ensures proper water flow and prevents puddles.
7. Common Mistakes to Avoid
- Skipping the base preparation
- Using the wrong infill
- Failing to secure edges properly
- Ignoring drainage needs
- Poor seam alignment
Avoiding these mistakes ensures a professional-looking, long-lasting installation.
8. Conclusion
Installing artificial grass is one of the best ways to achieve a beautiful, low-maintenance lawn that stays green all year long. With the right preparation, tools, and attention to detail, you can transform your outdoor space into a clean, eco-friendly, and enjoyable area for family, friends, and pets.
Whether you choose to DIY or hire professionals, this investment enhances your home’s curb appeal and saves you countless hours of yard work.